> ## Documentation Index
> Fetch the complete documentation index at: https://docs.trackup.me/llms.txt
> Use this file to discover all available pages before exploring further.
# Átomo Pay
### Conecte sua conta da Átomo Pay ao Trackup e registrar conversões automaticamente.Adicionar nova Plataforma de Vendas no Trackup
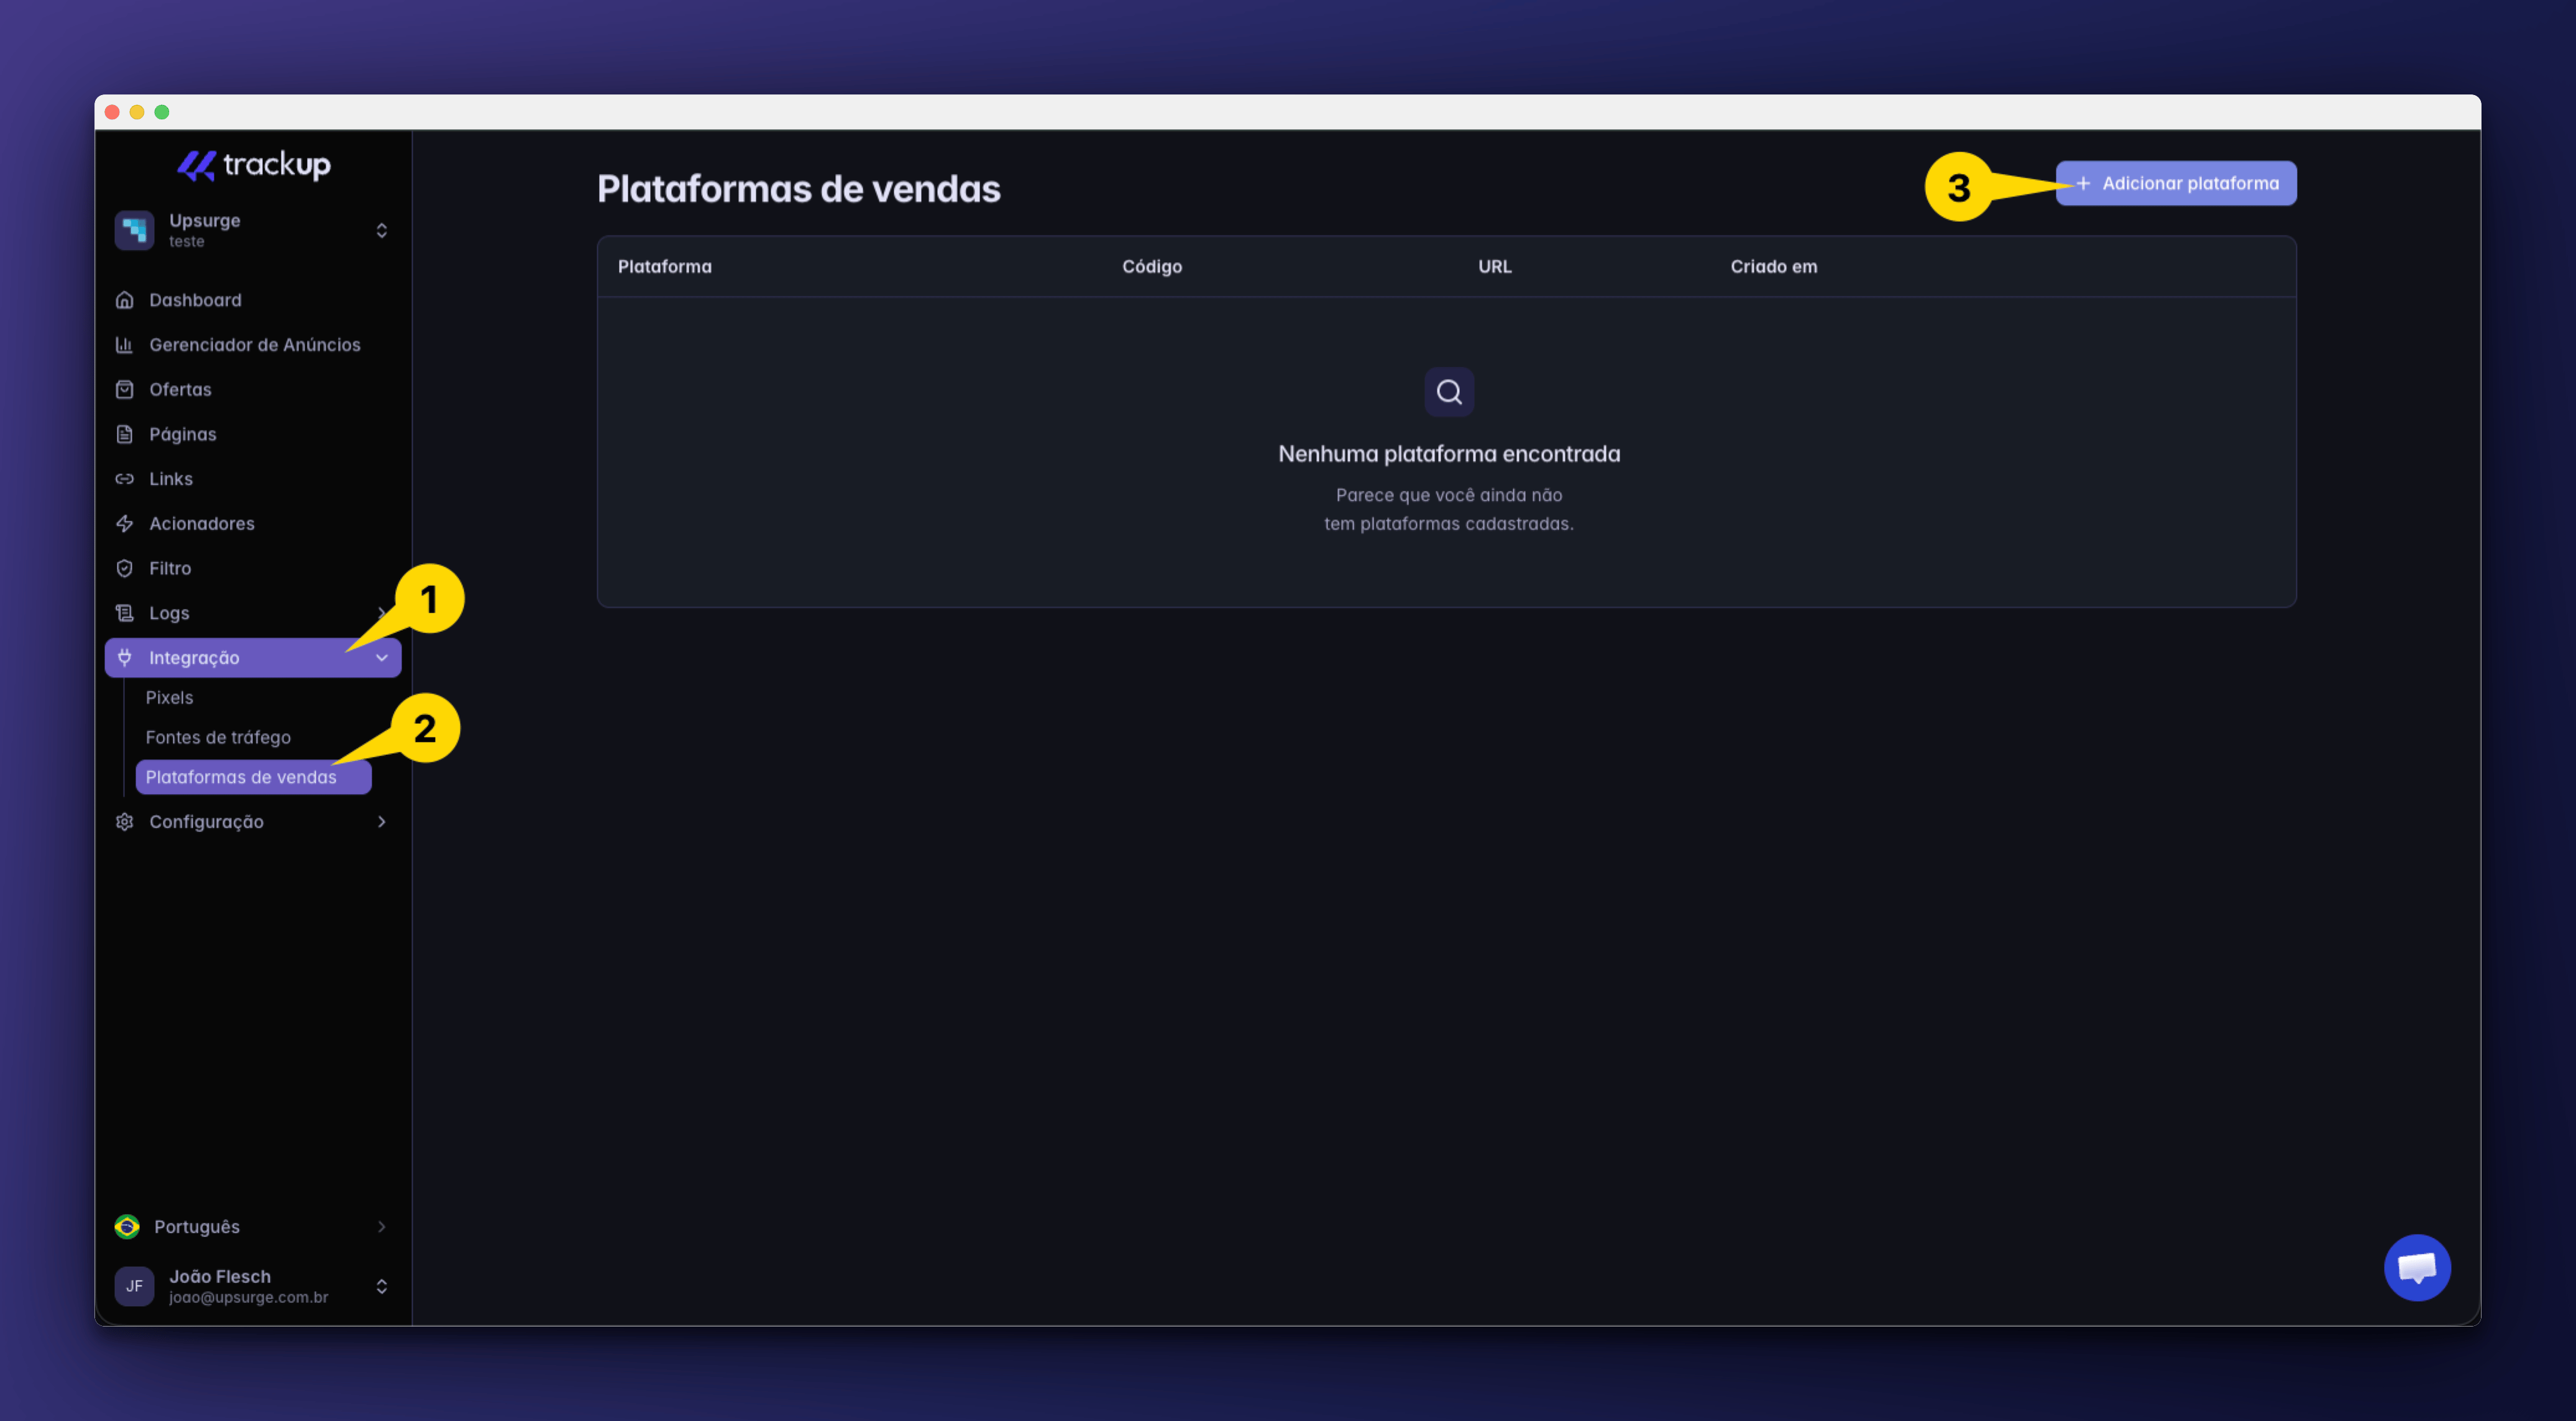
Acesse:
```text theme={"dark"}
Projeto → Integrações → Plataformas de Venda
```
Clique em:
```text theme={"dark"}
+ Adicionar Plataforma
```
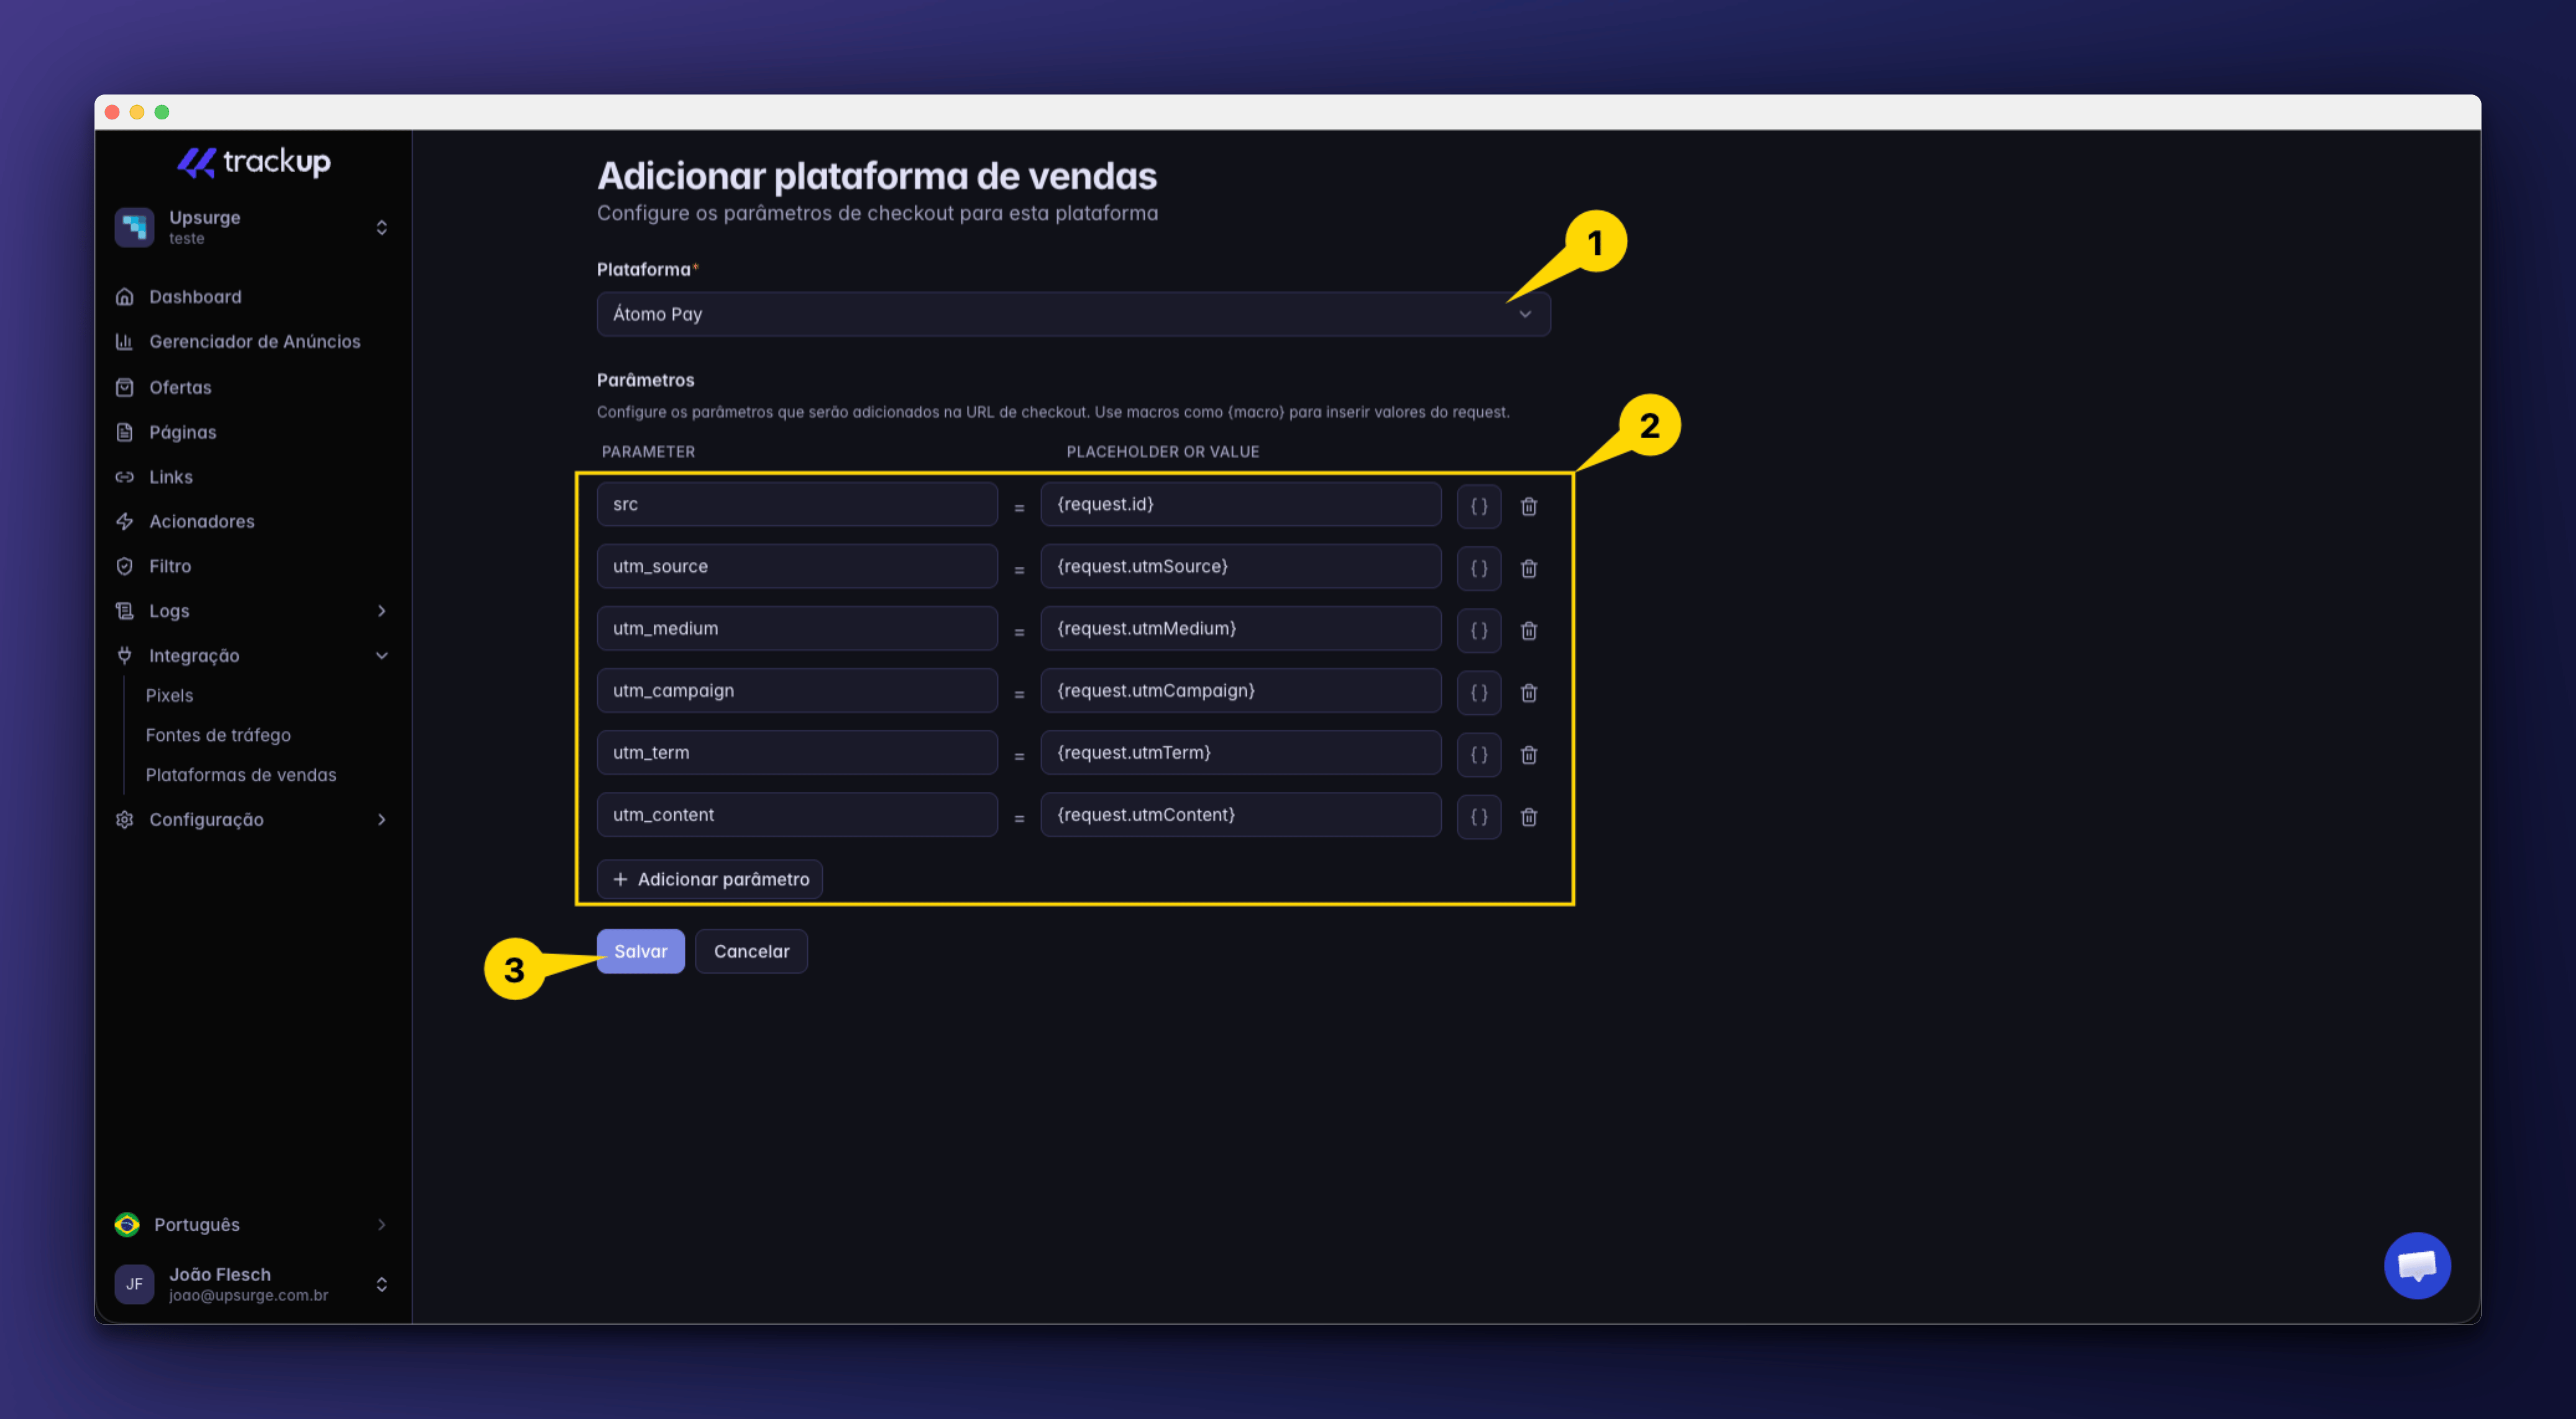
 Os parâmetros mínimos necessários serão preenchidos automaticamente pelo Trackup, caso você queira pode personalizar.
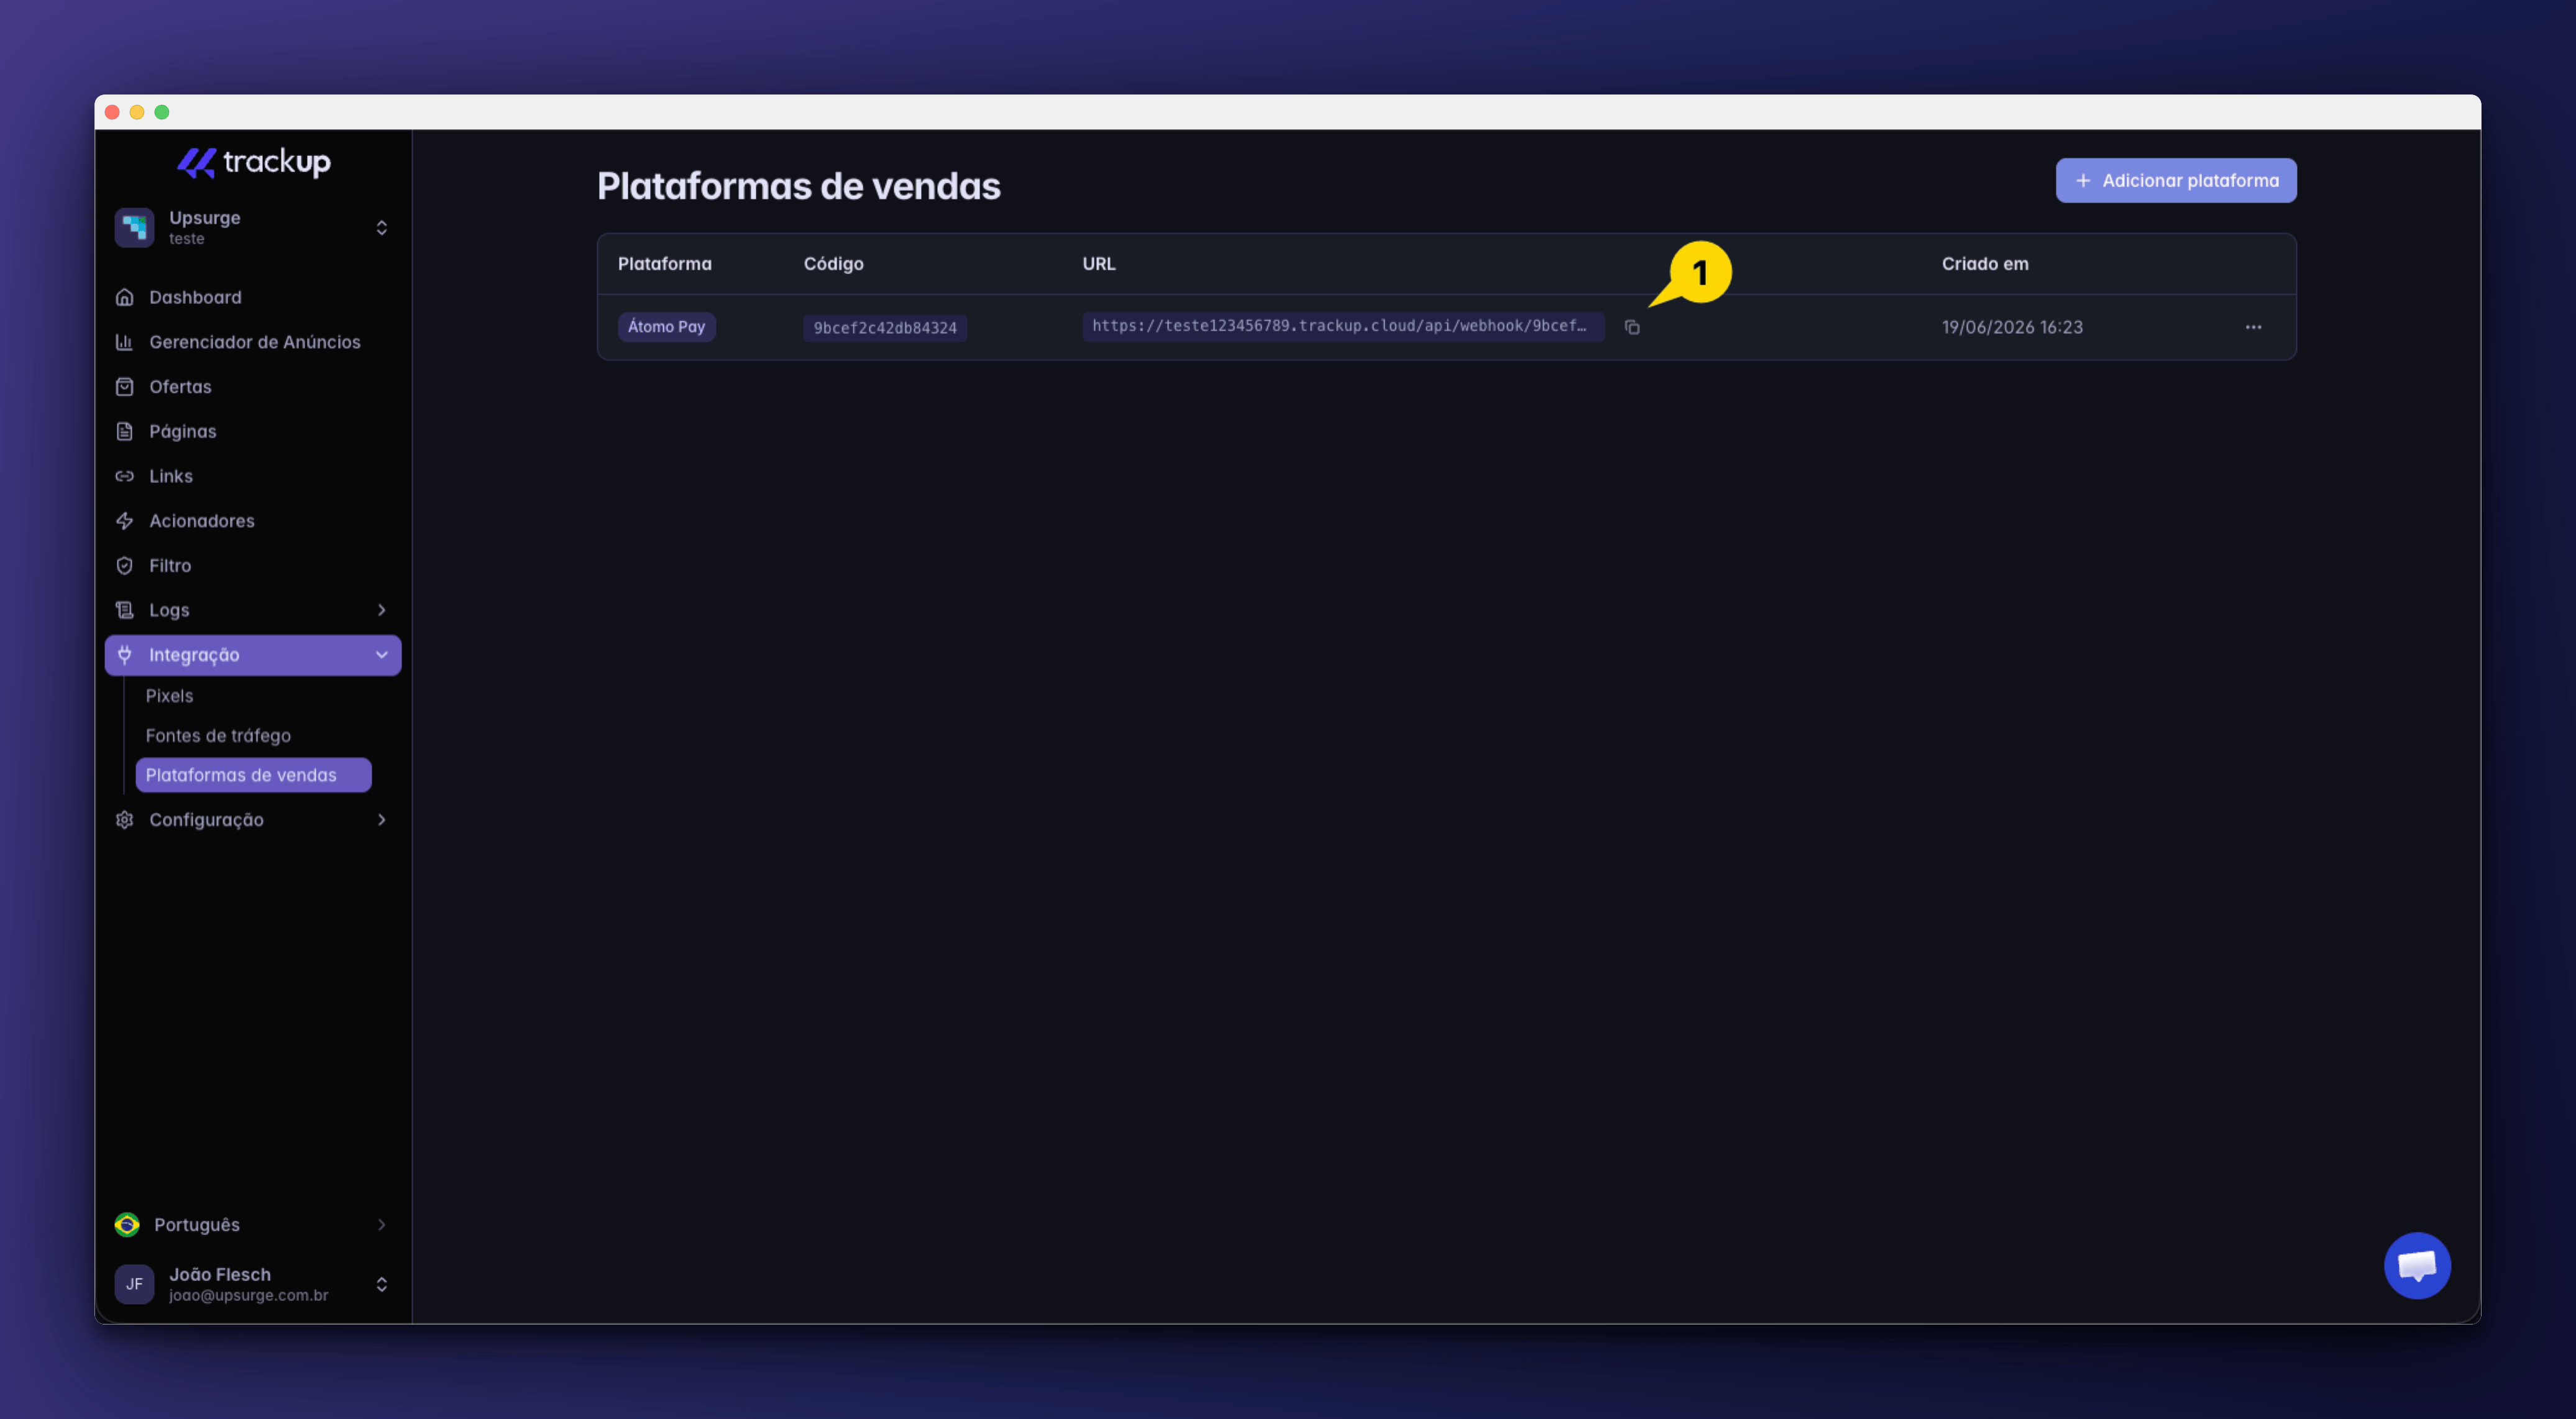
 Toda integração gera automaticamente um endpoint exclusivo para receber notificações de venda.
Exemplo:
```text theme={"dark"}
Webhook URL
https://trackup.me/api/webhook/xxxxxxxxxxxx
```
Copie essa URL.
Você precisará inseri-la dentro da plataforma.
Toda integração gera automaticamente um endpoint exclusivo para receber notificações de venda.
Exemplo:
```text theme={"dark"}
Webhook URL
https://trackup.me/api/webhook/xxxxxxxxxxxx
```
Copie essa URL.
Você precisará inseri-la dentro da plataforma.
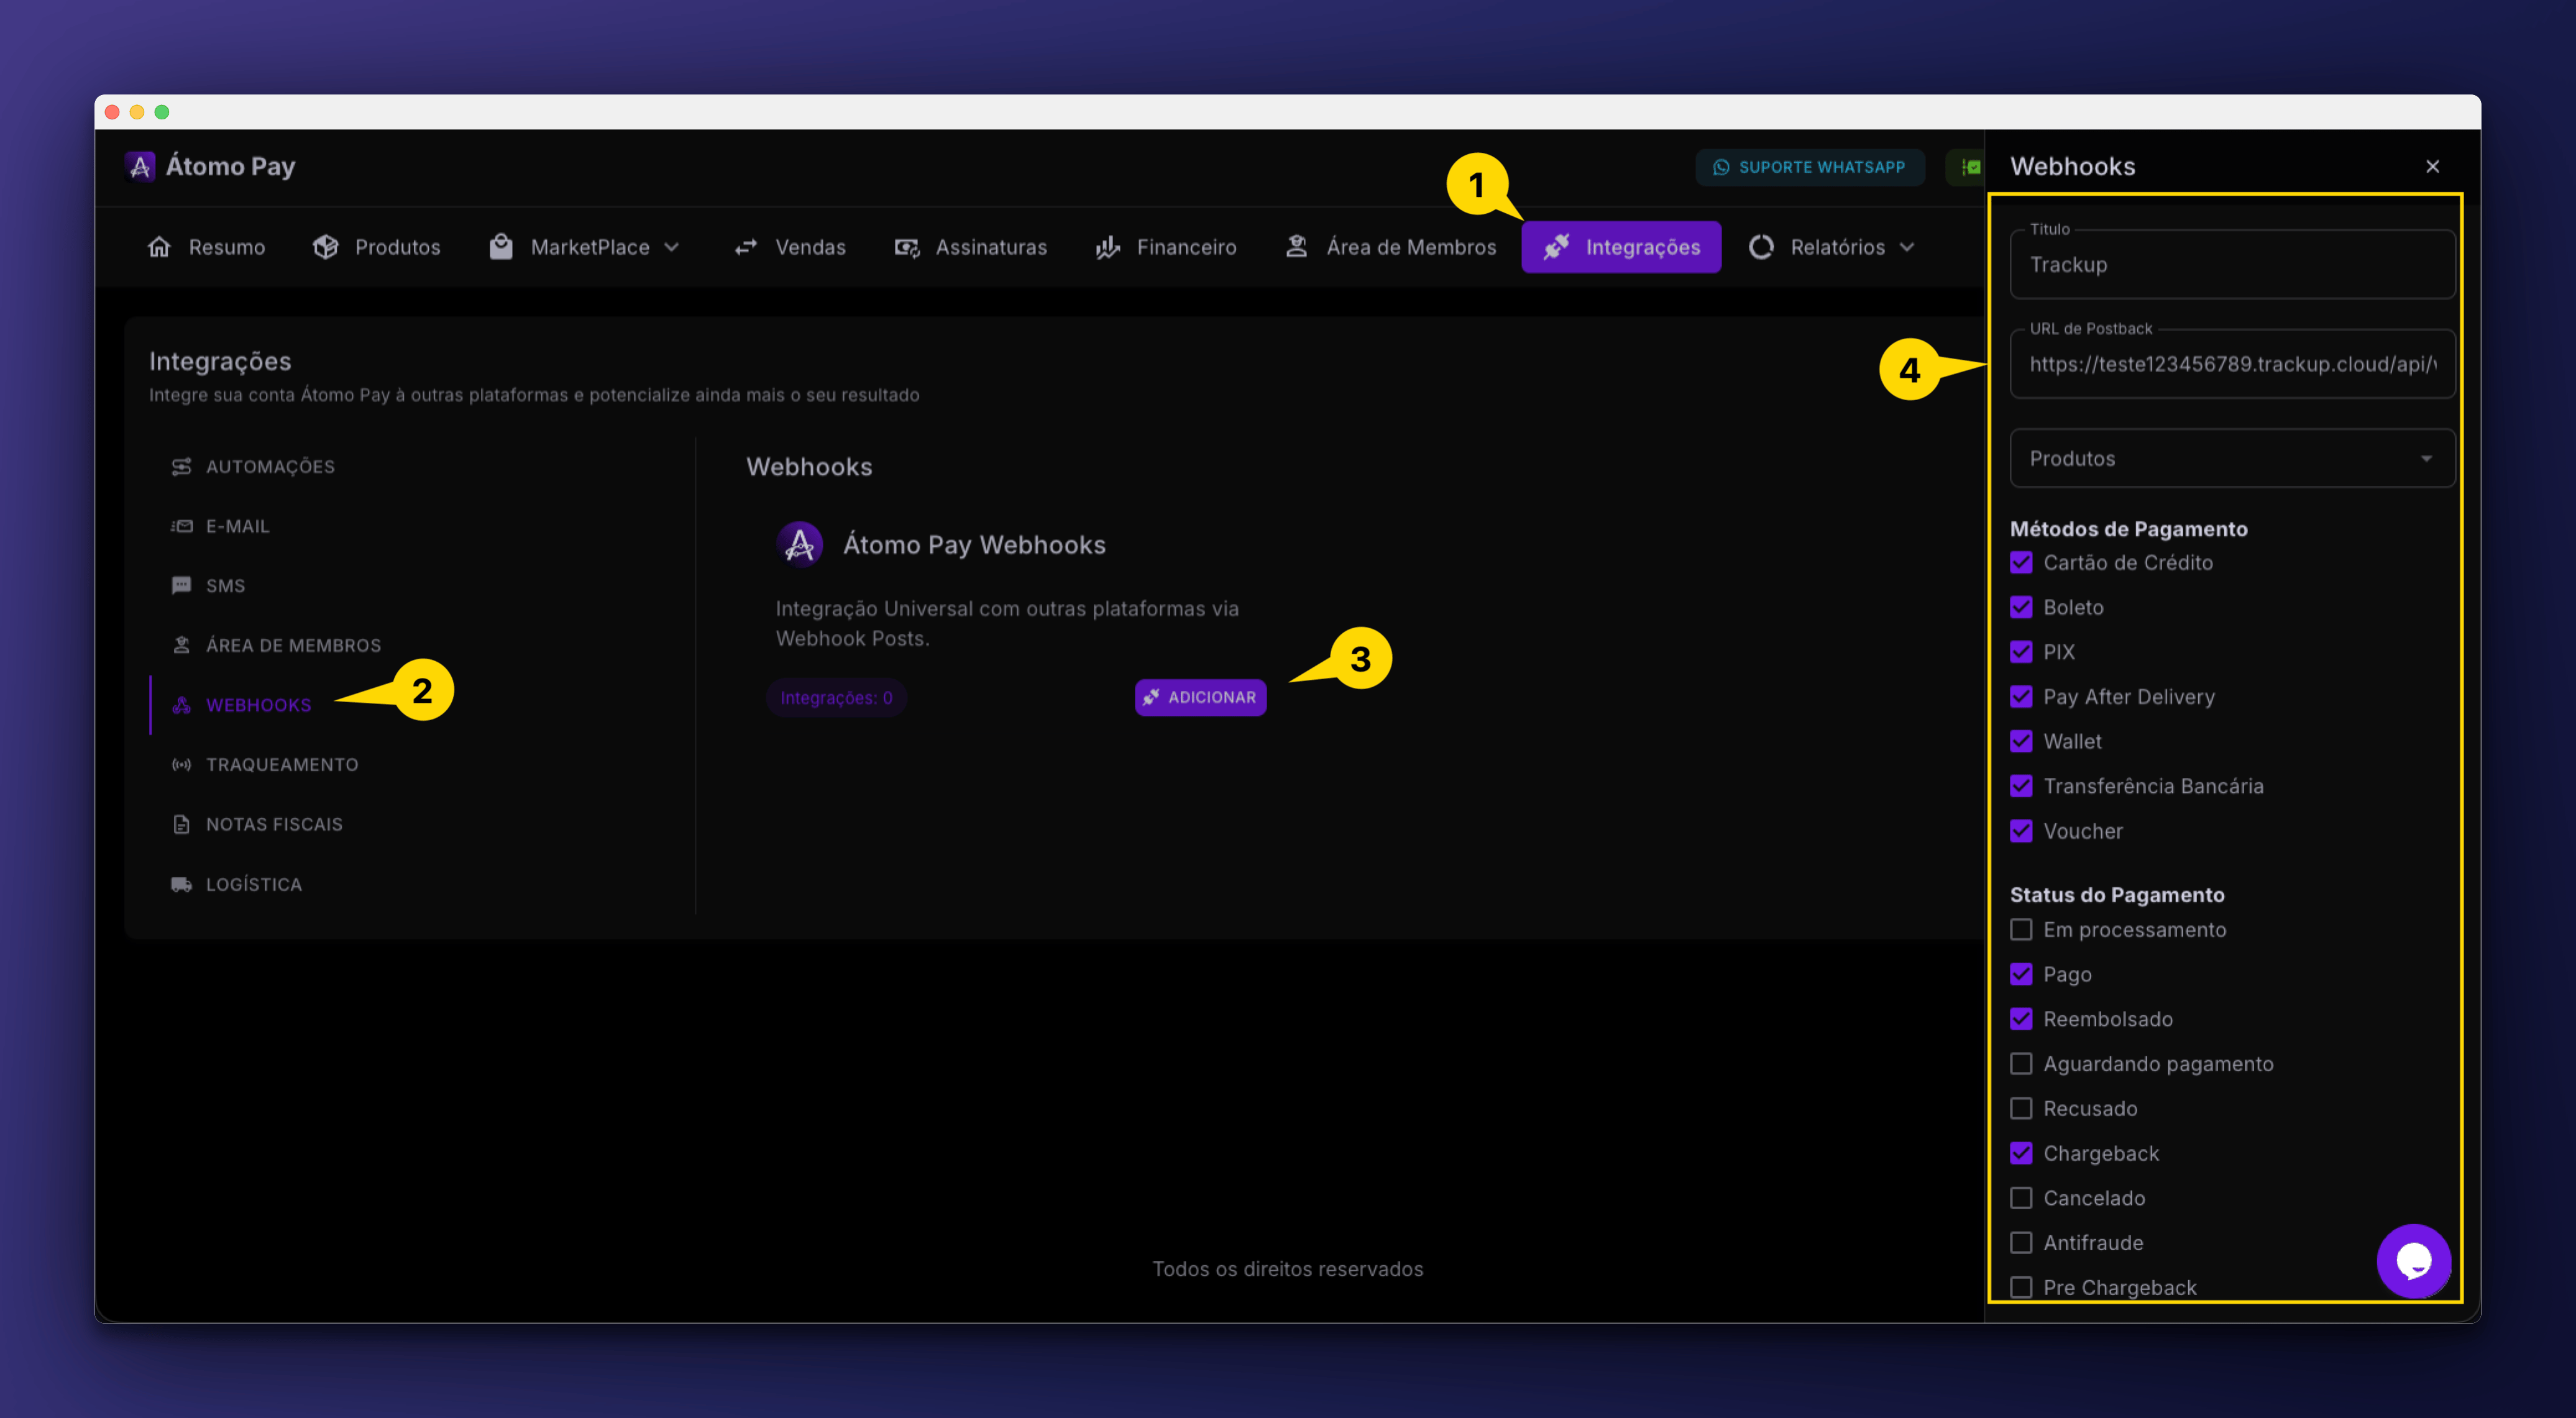
 Agora acesse o painel da Átomo Pay.
Localize a área responsável por notificações, integrações ou webhooks.
Cole a URL gerada pelo Trackup, e selecione os campos necessário
```text theme={"dark"}
Átomo Pay
↓
Integrações/Webhooks
↓
Adicionar
↓
Colar URL do Trackup
↓
Selecione os Produtos
↓
Marque todos métodos de Pagamento
↓
Marque os Status de Pagamento (Pago, Reembolsado, Chargeback)
↓
Salve
```
Agora acesse o painel da Átomo Pay.
Localize a área responsável por notificações, integrações ou webhooks.
Cole a URL gerada pelo Trackup, e selecione os campos necessário
```text theme={"dark"}
Átomo Pay
↓
Integrações/Webhooks
↓
Adicionar
↓
Colar URL do Trackup
↓
Selecione os Produtos
↓
Marque todos métodos de Pagamento
↓
Marque os Status de Pagamento (Pago, Reembolsado, Chargeback)
↓
Salve
```
 ## Integração concluída
Se tudo foi configurado corretamente, sua conta da **Átomo Pay** já está conectada ao ecossistema Trackup.
A partir deste momento, novas vendas começarão a aparecer automaticamente no painel de conversões.
## Integração concluída
Se tudo foi configurado corretamente, sua conta da **Átomo Pay** já está conectada ao ecossistema Trackup.
A partir deste momento, novas vendas começarão a aparecer automaticamente no painel de conversões.